
How to factory reset iPhone? When this thing pops up in your mind, you must be willing to sell your iPhone or want to wipe off every bit of data from your iPhone for some reason.
Whatever it is, the major purpose is to erase all the private information on your iPhone. Factory reset will make your iPhone look like you’ve just purchased it.
We’re here with a complete guide & stepwise tutorials relating to different scenarios for Factory resetting iPhone. Also, we’ve mentioned some essentials that’ll ease your lives.
Go ahead & read this blog until the end to find your answer. So, let’s do it!
iPhone Factory Reset vs. Hard Reset – When to do what?
What's in this article...
We want to ask you if you know the difference between factory reset & hard reset for iPhone. Whether you know it or not, we’ll make it clear.

Factory Reset
When you want to erase your iPhone data, a Factory reset is always a better option.
Meanwhile, you should know that doing so will remove your apps & their data as well. Your entire system will be cleaned. You may do this every time you install a new version of iOS on your device.
So, now you know how Factory reset works.
Hard Reset
Hard reset means you’re simply resetting or rebooting your iPhone just because it is not functioning properly due to some reasons. It cleans the hardware-associated memory & updates it with the latest versions. Your app & data will be retained & not erased here. So, you must have got your concepts clear, right?
In short, after hard resetting your iPhone, your CPU refreshes & restarts with a new vibe.
Here is what you must do before performing Factory Reset
Backing up your iPhone will save you from data loss later on when your iPhone restarts. Let’s say, if you want to access any data, it’s handy for you.
So, we’ll show you two ways to backup your existing iPhone data.
-
Backing up data to iCloud
To be specific, you must be logged in to iCloud to perform this step. Hence, if you aren’t already signed in, you must do it first.
Follow these steps below:
-
-
- Go to the ‘Settings’ section.
- Tap on the [Name].
- Select iCloud.
- Scroll down to iCloud Backup.
- Click on Back Up Now.
-
That’s it. Your iPhone data is stored in iCloud successfully. If you don’t want to do this, follow the second method mentioned next.
-
Performing Backup using PC or Mac
Here are the steps to backup your iPhone using your PC or Mac:
- Plugin your iPhone to your PC or Mac
- Click on the small device icon in iTunes
- Look out for Automatic Backup & click on it
So, this is all you’ll have to do & your data is synced & backed up with iTunes.
How to Factory Reset iPhone 7, 8 & 11? [4-Step Guide]
Now, we’re all set to perform a factory reset your iPhone. Also, let us tell you that this tutorial will work for iPhone 7, 8 & 11. Let’s proceed to the steps now:
- Initially, Go to Settings > Tap on General > Reset. You’ll see numerous reset options. But as you want to factory reset here, tap on ‘Erase All Content and Settings.’
- Next, you’ll have to confirm that it’s you who is performing a factory reset. Enter the passcode, Touch ID, or Face ID as confirmation & hit Erase iPhone.
- Log in to your Apple ID & confirm that you want to remove it from the device. Additionally, you should know that find my iPhone feature will be disabled.
- Now, it will take a few minutes & your iPhone data will be formatted. Finally, a prompt will appear to help you set your iPhone as a new device.
Congratulations! You’ve just performed a factory reset for your iPhone.
This happens so smoothly when you own the iPhone, have Apple ID & know the passcode, right. What if you don’t have it?
Don’t worry; we’ll provide the solution.
How to protect your eyes from daily usage of Mobile Devices?
How to factory reset iPhone without a password?
You’ll learn how to reset your iPhone when you forgot your password. We’ll show you two methods here.
Method -1: Factory resetting iPhone without Password using Settings

However, fulfilling these two basic requirements for this method to work.
- You can do it only if you’ve done iCloud backup anytime before.
- Along with this, your ‘Find my iPhone’ feature must be enabled for it to work. It allows Apple to identify your phone.
Once you’re all set with these minimum needs, follow the steps as mentioned below:
- First things first, Go to Settings > General > Reset > Tap on ‘Erase all Content and Settings’
- As you restart your iPhone, you’ll see ‘Hello’ screen & it makes you feel like your iPhone is brand new.
- Lastly, You’ll now see Apps Data Tap on Restore from iCloud Backup > Choose Backup & proceed. That’s all.
8 Top Video Converters in 2020: How to Convert Video Files for Free?
Method -2: Use Dr.Fone to Factory Reset iPhone without Passcode
If you’re learning about Dr.Fone for the first time, then we would say that better late than never.
Dr.Fone Screen Unlock tool is just perfect for any iPhone models to factory reset if you don’t have the password at the moment. Additionally, it helps iPhone users to fix many smartphone-related issues that may have cost them big.
You only have to follow the steps below & get sorted:

- Firstly, Download Dr.Fone & install it on your Windows or Mac.
- Secondly, Launch the tool & select the Screen Unlock option from the Home screen.
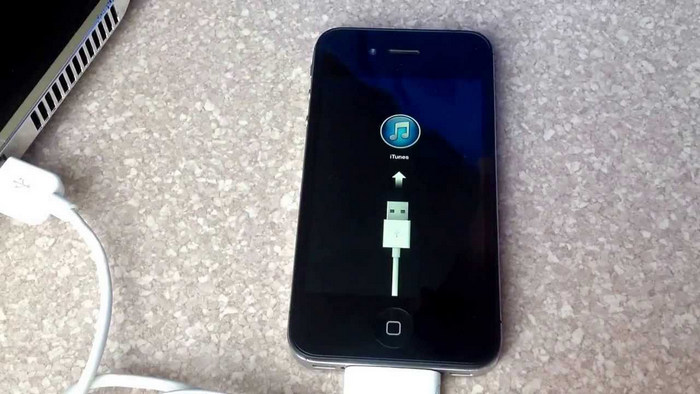
- Thirdly, Power on your iPhone. Hey! Don’t worry if it is locked. Make sure you’re using your original data cable to connect it to your PC. Close iTunes if it launches automatically.
- Click the Unlock iOS screen option in the tool. Use this option when you connect your locked iPhone. This will initiate the factory reset mission. So, did you find it easy?
- Fone will ask you to activate the DFU mode. Follow the instructions as displayed on the screen, depending on your iPhone model.
- Enter your iPhone’s basic details as required here & click Start.
- Once the firmware downloads completely, click on Unlock Now & restore your iPhone. As you know that your iPhone data will be totally cleared, this tool asks for confirmation.
- Finally, your iPhone will normally start once this process is complete.
Kudos! Time for celebrations!
How to perform a factory reset for iPhone without Apple ID?
Suppose you think you can ever reset your iPhone without Apple ID, yes! You can.
Note:
- This method applies to both the iPhone & iPad.
- Disable the ‘Find my iPhone’ option.
We’ll use iTunes to reset your iPhone without having Apple ID with you. Here are a few steps to be followed & your iPhone will be up for use.
- Plugin your iPhone with an original data cable to your PC or Mac.
- Launch iTunes.
- Please respond promptly whenever you’re asked to provide an iPhone password or Trust this Computer.
- Please select your device as it appears on the iTunes bar. Click on Restore iPhone.
- A dialog box will appear as a confirmation of your restore request. Click Restore & iTunes will erase your iPad or iPhone data. Moreover, it will install the latest iOS on the device.
- Lastly, as the process completes successfully, your device will restart.
Restoring your iPhone to Factory Settings using Buttons
Do you want to know how to factory reset iPhone with buttons? It would be best if you had a different solution.
We mean to say that this method implies for Hard Reset & not Factory Reset. If you wish to perform a hard reset for your iPhone, here is what you should be reading right now: How to Hard Reset iPhone? [All Models]
So, that’s all to share at the moment.
We hope you have found what you were looking for. Moreover, if you like such technological reads, keep coming here.
Stay tuned for more of such helpful reads.