
This site can’t be reached error in Google Chrome is very common.
Many users get this error but are unaware of what they should do next. If you want to get rid of this error permanently, then we have permanent fixes.
‘This site can’t be reached Error’ – Why do you get it?
What's in this article...
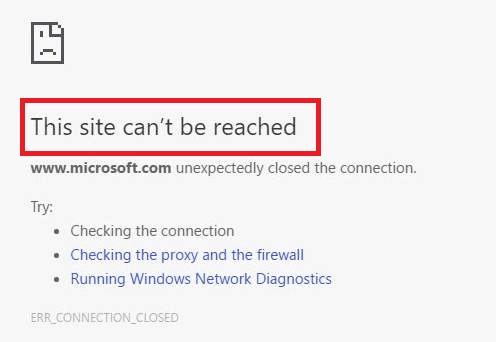
Commonly, this error is raised because of DNS Lookup failure. When the website name fails to be translated into an internet address, this error is triggered. This happens because of internet connection issues or network settings. Also, your firewall settings might be configured to prevent Google Chrome from loading particular webpages.
These are some basic reasons you receive any of the following error codes (visible in the last line above “Reload” button)
- THE server DNS address could not be found.
- ERR_CONNECTION_TIMED_OUT
- ERR_CONNECTION_REFUSED
- ERR_CONNECTION_CLOSED
- DNS_PROBE_FINISHED_NXDOMAIN
Let us agree that these errors are common with Google Chrome users or happen with Windows 8, 10, Linux OS as well as Android devices.
No matter if you’ve been receiving any of the above error messages, you can still fix it. Moreover, the best part is you don’t need any technical knowledge to solve this issue. Let’s go!
10 Tried & Tested Ways to Fix “This site can’t be reached an error.”
Matter of fact is, every problem has a solution; we have one for this too! Or, should we say, we have many fixes – see what works for you.
-
Clear Browser History, Cache & Cookies
- Open Google Chrome
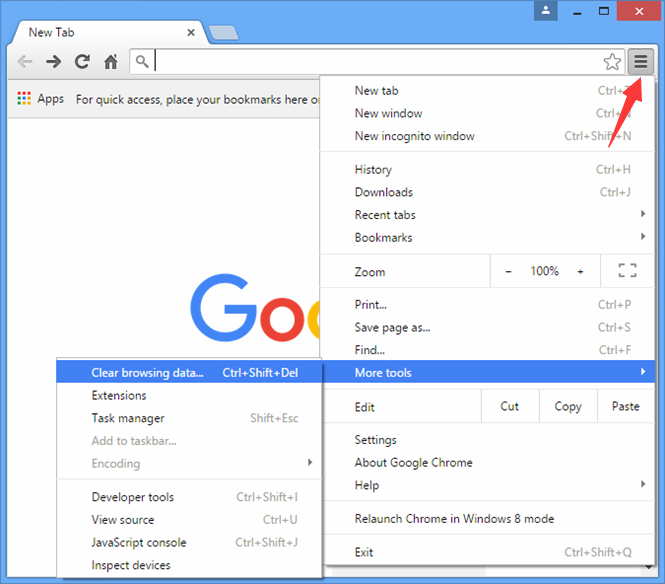
- Click on the three-dotted icon on the top-right of your browser window
- Click on More Tools -> Clear Browsing Data (Ctrl + Shift + Del)
- Next, you’ll have to choose a time range. Select All time
Check the boxes against Cookies & other site data and Cached images & files
- Click Clear Data button
This will empty your cache and clear all cookies to date. Also, it clears browsing history for a fresh start. Lastly, you may then access the URL again & see if the error is resolved or not.
2. Restore Browser Settings to default
Before you reset Chrome:
Backup all your existing Chrome data. So, you don’t lose any important data & can be reset if required. This is essential because resetting Chrome settings will delete all your existing data.
- Open Google Chrome
- Click on the three-dotted icon on the top-right of your browser window
- Select Settings, scroll down to the bottom & select Advanced
- Click on Reset and Clean Up from the left panel
- 5 Select Restore settings to their original default in the right panel
Finally, you’ll view this message as the final step before you reset:
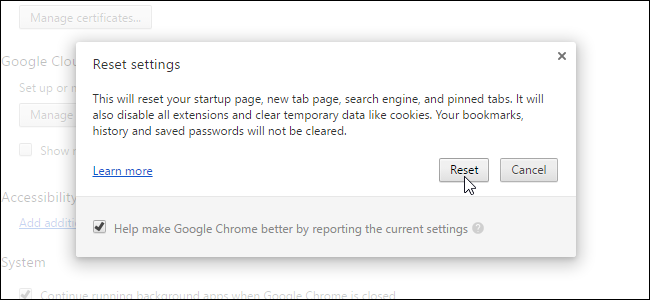
By performing the above-mentioned steps, any temporary data will be restored. All this includes a homepage, saved forms, history, cookies, tab settings, etc. Finally, your purpose is fulfilled.
3. Restart DNS Client
First things first, your issue resolves with DNS client restart. You only need to stop & restart DNS service for this, the steps for which are as follows:
- Tap (Windows Key + R) on your Keyboard
- Type cmd & hit Enter to open Windows command prompt
- Type net stop dnscache & hit Enter (doing this will stop the DNS service & it will take a few seconds for it to stop)
- Type net start dnscache & hit Enter (doing this will restart DNS service on your system)
Run this command: ipconfig/flushdns to reset DNS cache & empty all the existing entries from it.
Moreover, if things are working as expected, you’ll see this message: Successfully flushed the DNS Resolver Cache.
4. Reset your Modem & Wi-Fi
Before you reset Modem & Wi-Fi:
Make sure you have broadband ID & Password that you can use to Login & set New User ID & Password for your internet
Some network issues trigger such error messages. In such scenarios, you can reset the modem & Wi-Fi manually.
Follow these steps:
- Unplug the power cord from your router
- Press & hold the reset button for 10-15 seconds.
- Once the modem lights start flickering, release the reset button.
However, It will take at least 3 to 5 minutes for the internet lights to turn green. So, connect to the internet by entering your account information.
5. Change your IPv4 DNS Address
- Access Control Panel
- Click View Network Status and Tasks
- Click Change Adapter Settings on the left-hand side Window panel
- Double-click the Internet connection icon in use
- Click Internet Protocol Version 4 (TCP/IPv4) & click Properties
- Enter new DNS address
Also, the commonly entered Google Public DNS server addresses are as below:
- Preferred DNS Server: 8.8.8.8
- Alternate DNS Server: 8.8.4.4
In conclusion, after completing all the steps, don’t forget to check the box along with Validate Settings upon exit & click OK.
6. Disable Proxy
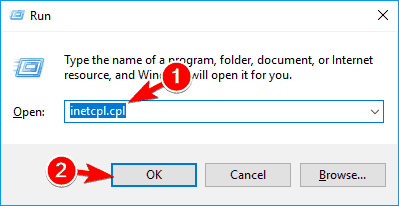
Step – 1 Press (Windows Key + R)
Step – 2 Type inetcpl.cpl & hit Enter (Internet properties tab will open)
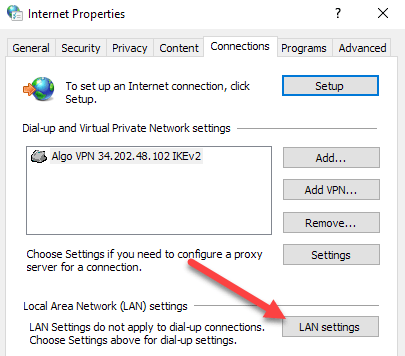
Step – 3 Go to Connections tab & click on LAN settings button visible in the bottom
Step – 4 Check Automatic detect settings & uncheck Use a Proxy for your LAN
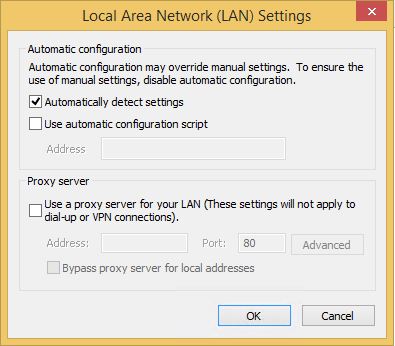
Step – 5 Click on Apply -> OK
Step – 6 Reboot your PC
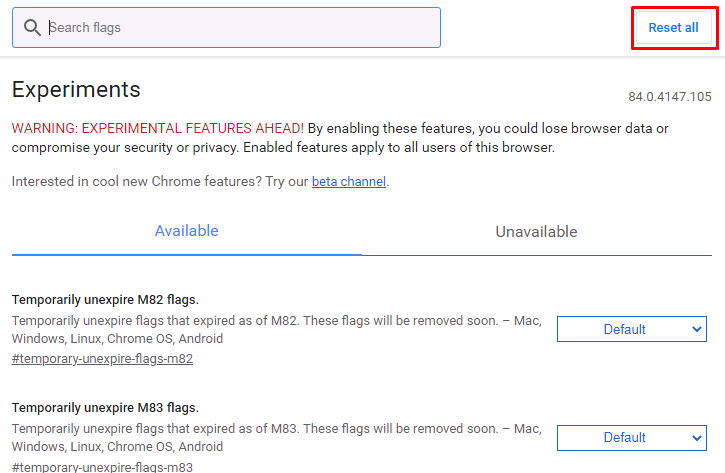
7. Reset Flag Settings in Chrome
- Type chrome://flags/ in your Chrome address bar & hit Enter
- you’ll view this type of screen where you have to click on Reset all
- Reboot your system & changes will be applied to Chrome
8. Change Value of ‘Maximum TLS Version Enabled’
Such error codes might show up even if the webserver has an outdated TLS version. You can run TLS Version Check or DIY by following these steps:
- Type chrome://flags/ in your Chrome address bar & hit Enter
- Press Ctrl + F and search TLS, you’ll view this
- Firstly, check for TLS 1.3 Version. You can continue if it is available. If not, click on the Default dropdown & select Enable

Step – 4 Restart Chrome to implement the new Settings
On the contrary, your TLS Version should be 1.3 as 1.2 is an outdated version now.
9. Run Windows Network Diagnostics
We have seen many ways above. Similarly, any networking-related problem can be encountered. You can fix it with windows network diagnostics. Follow these steps to run network diagnostics for windows:
- Press (Windows + R)
- Type inetcpl.cpl & hit Enter
- Click on Diagnose to run Network Troubleshooter
- Let the diagnosis complete. Disconnect the internet & reconnect it to your system. Restart Chrome to see if the error fled away.
10. Reinstall Chrome
The last thing you can try to get the ball in your court is to reinstall Google Chrome. Firstly, you should uninstall the existing version from your system & again download the latest version from Google.
Here are the steps to uninstall Chrome browser:
- Go to Control Panel -> Uninstall a Program -> Uninstall Google Chrome
- You will also have to remove Chrome data from the local system. To do so, go to C:\Users\%your_name%\AppData\Local\Google\ & delete everything in the folder.
- Also, Download & Install the latest version from Google.
- Reboot your PC & access the domain again
If none of the above works for you – Try this!
Run Malware Scan for your Device
Sometimes, it’s not the browser that causes issues with loading the website. In addition, the antivirus installed in your system prevents accessing dangerous websites. Similarly, make sure you’re scanning your system regularly & have updated Anti-virus installed like QuickHeal or compatible.
Lastly, run a Malware Scan on your system to remove malware, if any.
The Takeaway
This tutorial helps you fix:
- this site can’t be reached err_connection_timed_out
- err_connection_timed_out windows 10
- this site can’t be reached refused to connect
- err_connection_timed_out only on one website
- this site can’t be reached the connection was reset
- err_connection_timed_out on my website
- This site can’t be reached error
Finally, we hope this tutorial helps. We’re here to help you if it does not work. Feel free to drop your queries or share your issues in the comments below.
In addition, we would try our level best for you. Till then, stay tuned with us for more of such problem-solving reads.