
Easy android user guide – How to use your android phone
What's in this article...
Easy Android Guide, No jargon just simple steps on how to use your New Android Mobile Phone…
This guide is perfect for anyone who has recently brought or is planning to buy a new android mobile phone. I plan to deliver the guide in a simple easy to understand manner and promise not to use too much jargon (at least without explaining what the jargon means!).
Your feedback would be greatly appreciated too, so I can improve and develop the guide, you can leave comments at the bottom of the page.
If you find this guide helpful, please support it by Tweeting it or adding it to Facebook.
Okay, time to get started…
Turn on your phone and let’s go through the home screen and key functions.
How to use the Android Home screen, Change wallpapers, Move and Delete Apps
 Let’s get cracking, I assume you have unboxed your phone popped in the battery (if required), sim card and memory card into the phone?
(Unfortunately, it’s very difficult to write a guide explaining this part of the process as nearly every Android phone is different in this aspect, the shop you brought your phone from should be able to do this for you).
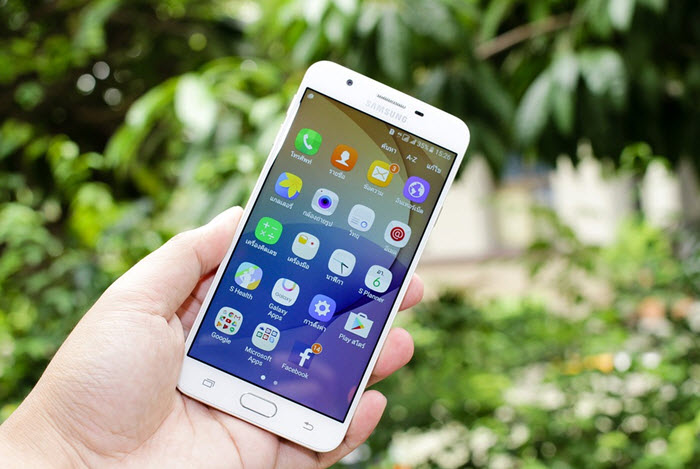
So turn on the phone by holding the power key down for around 5 seconds, once the phone has turned on you should see something like the picture on the right.
Please note, sometimes when turning a new android phone on it will prompt you to do a quick setup, if your unsure what any of it means I would recommend tapping on next until you the see the home screen on the right.
The Android Homescreen Broken down into little pieces
A brief overview or the Notifications bar, Widgets, apps and the quick start menu.
In the picture you can see some clearly labelled parts of the home screen, most Android phones will look like this, yours may be skinned differently which means it may have different colors, icons etc… but it will roughly be in the same layout of this.
Below is a more detailed description of what each bit does.
The Notification Bar: Simply put, this notifies you of a new Text Message, Email or Missed Phone call. If you have either one of them a little icon will display in the notification bar to alert you.
Internet Speed: This icon tells you what speed your internet is running at, it will either display a G which means low-speed 3G which means Medium to high speed or H which means high speed. Ideally, you always want this to be 3G or H but this is subject to your phone signal.
Signal Strength: Talking of Phone signal, the signal strength indicates exactly how much signal your phone is receiving, this will be anywhere from 1 bar to 5 bars.
The higher numbers of bars that glow the better signal your receiving, again this can differ and is down to your network providers signal strength in that particular area.
Battery Monitor: This simply tells you how much battery you have left. Green means you have a good healthy power supply, red indicates you need to charge your phone at the earliest opportunity.
Time: Shows the current date and time, further down the guide I show you how to edit this.
Widgets: Think of a widget as a little badge that you can interact with, many of the apps found on android will contain and optional widget that you can put onto your home screen, These Widgets are basically smaller versions of the app designed to run on your home screen so you can see them at a glance.
For example a few news headlines from your favorite news app.
App Shortcuts: Think of your desktop PC and you’re bound to have shortcuts to your favorite websites or software. App shortcuts do exactly the same, they provide a shortcut to your favorite apps or pages. Don’t worry, you don’t need to be a developer to use your apps.
Quick Start Menu: In the quick start menu you normally have a Phone icon, an icon made of loads of little squares and either a Message or Internet icon.
Again these are similar to App Shortcuts, the main one to focus on though is the icon with the squares inside as this loads your main menu.
The Android Notifications Bar in more Detail – How to access it and use it
The notification bar is positioned at the top of the home screen (see pic before this section). It alerts you if you have a new Text message, Missed a Phone call or Received a new email.
How does it alert you?
Simply by placing a little icon within the bar, this could look like a phone with an X next to it highlighting it’s a missed call or an icon of an envelope to highlight you have a new Text Message or Email.
How to access the notifications bar?
Simply use your index finger and place it on the notification bar (don’t tap!) leave your finger on the screen and in one swoop run your finger down to the bottom of the screen. This will slide the notification bar out from the top of the screen.
Within the notification bar it will give you more detail to the calls you have missed and messages you have received. You can access these missed calls or text messages by simply tapping on them once.
How to add a Widget or App Shortcut
One of the aspects I love about Android is that it is completely open-source, meaning unlike Apple OS, anyone can work on any part of the code. What this does is let developers create practically anything they want to do the work for.
So now there are probably millions of apps and different accessories created just for your Android phone. And most are Free! Campad Electronics and a host of other sites have lists and lists of cool stuff made just for Android. So if you have a need for something that isn’t already on your new phone, just start browsing and I guarantee you’ll find what you’re looking for.
To add a widget or app simply place your finger on an empty area of the home screen for around 3 seconds This bit’s really easy, simply place and hold your finger on an empty part of the home screen, the phone will vibrate and show a menu similar to the one pictured.
Simply select whether you want to add a Shortcut or widget by tapping on the screen.
Then selected your desired app or widget again by tapping it once and it will place it back on the home screen.
Learning is about trying it for yourself so give it try now.
,
How to Move & Delete Apps and Widgets around the Home Screen
To delete an app or widget, press, hold and drag it to the Trash Bin. The great thing about Android software is you have full control over how it looks, which means you can move apps and widgets to a section of the home screen you choose. I have a few friends that are app developers based in London working on a really cool app for this. When they’re finished with it, I’ll definitely be doing a write up on it.
You can do this by simply touching and holding the app or widget you want to move, the phone will vibrate and your then free to drag the app or widget to your desired place on the home screen. Neat huh?
Now to delete an app and Widget it’s very similar to above.
Touch and hold your finger on the app or widget you want to remove, it will display a screen like the one pictured.
Do you see the little trash can at the bottom? Simply drag the app or widget to the trash can and let go.
This will remove the app or widget from the home screen. Don’t worry if you do this by accident, it can be undone by following the how to add an app or widget guide above.
How to change the Homescreens Background / Wallpaper
Customize the Android Homescreen by changing the Wallpaper.
Changing the wallpaper is simple Want a personal picture as your background? or fancy a more colorful pre-installed background picture?
Well first these background pictures are actually called Wallpapers and I’m going to show you how to change them now.
Like before press and hold your finger for 3 seconds in an empty space on the android home screen, the phone will vibrate and show a menu.
Select Wallpapers and another menu should display like the one pictured. You then have 3 options which you can select by tapping once. I’ve detailed below the 3 wallpaper types.
Live Wallpapers: These are simply images that move, for example, a grass background has the strands of grass blowing in the breeze. They look really good but do drain the battery quickly so I would avoid using them if the battery becomes an issue. You can check out my list of the best live weather apps here.
Pictures: This allows you to use a picture you have taken or one that has been saved to your phone. This is the ideal choice if you want a personalized feel to your new phone.
Wallpapers: These are simply pre-installed pictures that come with the phone
Select your desired wallpaper type by tapping it once. Scroll through the images available and select the one you want by tapping on it once. Boom! your wallpaper has been updated!
A video tutorial of the above modules.
Here is a video highlighting how to use the home screen on an Android phone.
Quick Menu Controls – What are they and how to use them
How to use the quick menu controls on the home screen. Ok, so a few chapters back I made an image highlighting the various bits of the home screen.
We’ve gone through customizing the home screen, changing wallpapers and moving widgets around.
Now I want to explain about the menu controls at the bottom of the home screen. These are basically the controls that give you access to everything else. They often consist of 3 buttons (see pictured) or sometimes 4.
These buttons are normally as followed.
A phone Icon: Tapping on this button gives you the option to make a phone call, you can dial a number manually or call someone from your contacts. We go through contacts a little later on!
Main Menu Icon: Normally the main menu icon is an image that consists of loads of little squares, tapping this once brings up the main menu which gives you all the other features of the phone, for example, Camera, Calendar, calculator, settings, etc… Once in the menu simply select you desired feature by tapping it once and it loads.
World / Globe Icon: This gives you instant access to the internet. Tap it once and the whole world wide web is at your fingertips.
Envelope Icon: This allows you to send a text message. We go through text messaging it more detail later.
Where to find your contacts and how to call them
How to find contacts on an Android phone. We are now going to look at using the phone to make calls and text messages, after all, that’s what they are designed to do. Let’s start with contacts…
To find your contacts click on the Menu icon on the home screen, remember this is the icon which has loads of other tiny squares within it. This will load up your main menu. Within the main menu, you will find another icon which will clearly be named Contacts, tap it once and it should show a screen like the one pictured.
Please note you may have to swipe your finger from left to right or up and down on the main menu to find the contacts icon.
How to call or text a contact on your Android phone
How to call or text a contact on the android phone So hopefully you have found the contact section using the guide above, it should be displaying all your contacts. If it’s a new phone you may need to add contacts or import them, I explain how to do this later on. Now let us call a contact
Okay, so to call a contact you simply need to find the contact you want to call, you can do this by sliding your finger up and down the screen. This will scroll through your contacts for you. On some phones you can use the Volume up and down keys found on the side of the phone to do this for you.
Once you have found your contact simply tap on it once and it will display a screen like the one pictured. This is your contacts information. it should be displaying at least one phone number, it’s possible to save more than one number per contact, for example, a contact may have a Home Phone number and a Mobile phone number.
As you can see from the picture next to the desired phone number you want to contact them through you can see 2 icons. One is a phone and one is is a speech bubble. Simply tap on the phone icon to call them or tap on the speech bubble to text and you’re done.
Please note On certain Android Phones you may have to Tap on the phone number first before the icons display.
Video tutorial of the above
Adding a new Contact and Importing contacts
Contacts menu on Android phone When you load up your contacts it’s not always obvious how to add a new contact or import contacts. Some phones have an obvious big + Plus sign which you simply tap on and others don’t.
So how do you add or import contacts?
On your Phone below the touchscreen there is a few more symbols or in some cases buttons. These are not attached to the touchscreen part of the phone. One of the buttons is actually a menu key, this hides the options that you need to edit or add contacts.
On most phones the menu key will say menu or have a symbol of 4 lines. Tap this once and it will display a screen like the one pictured.
How to add a new contact to your Android phone
It’s as simple as tapping Add contact. How to add a contact on an android phone You have probably guessed already that you can add a contact simply by clicking on the New contact symbol in the menu. Once you’ve tapped it, it brings up a menu like the one pictured.
All you need to do after that is fill in the details. You can do this by simply tapping on the white box. This will display an on screen keyboard where you can type in the correct details.
Once completed tap done and your well ……. done!
Learn how to import your Contacts from the Sim Card to your Phone
How to import contacts onto an android phone So like we did above with adding a new contact you need to hit the menu button to display the contacts menu and then tap on Import / Export. This will display a menu like the one pictured.
You then need to tap on Import from Sim Card and then select all. This will now copy your contacts from your sim card to your phone.
You also have options to Import and Export to SD Card, this is rarely used and is optional.
Seeing double contacts? Some android phones automatically display the contacts from the sim, so if you copy your contacts from the sim card they could be duplicated. Heres the quick fix.
On Contacts select menu to display the menu for contacts.
Then tap on Display Options and make sure only Phone contacts is ticked, if sim contacts are ticked then untick it by tapping on the white box.
Then hit save.
Video Tutorial of the above
How to Send a Text Message on an Android Phone
So the next big step is how to send a Text Message after that I’m going to start wrapping this Basic Guide to Using Android up. So let’s get on with it.
Open up your main menu from the home-screen, (I wont keep repeating how to do it, I’m sure you know by now). In the menu locate the icon that is clearly marked with Text messaging or Messages. Tap on the icon once and it should display a page similar to the one pictured.
If you have text messages already you will see them below the Create a New Message section, to read them simply tap on the message once.
If not, you will have a blank screen like the one pictured. So let’s create our first text message.
Writing a Text Message and sending it to a contact
Creating a Text message on an android phone Once you have tapped on Create a Message you should see a page similar to the one pictured.
Simply tap on To and start to input the name of the person you want to send it to, it will automatically predict the contact you’re trying to spell.
Once you have successfully located the contact, tap onto composing and write your message.
Once your done, tap on send and job done!
Wrap up
Okay, so that’s my Easy Android Guide – The Basic’s complete. I hope you have found it easy to follow.
I will be creating additional guides on more advanced features such as Email address, Downloading apps and editing settings which I will put a link up to when I have completed them.
Like I said previously, I would love to hear your thoughts and opinions on my page and offer feedback on how to improve the guide. Also if you would like to ask me a question in reference to Android please feel free. You can contact me using the comments below here on Team-TouchDroid.